Toon water material by Cinema 4D node material
When Cinema 4D came with node-based materials, I wanted to do a procedural representation of toon water, and I tried to do it about two years ago, but it wasn’t very good at the time.
It wasn’t bad in terms of direction, such as using an ambient occlusion as a mask to represent a rippling edge, but it’s clear that I didn’t look at the reference carefully and didn’t know how to make it look like water.
After that, I was able to make the water flow reasonably well, but I couldn’t handle the white waves on the shore yet.
Recently, I decided to give it another try and searched for a good idea on “Toon water shader” and found a tutorial page to create a toon water shader in Unity.
Unity Toon Water Shader Tutorial at Roystan
When I saw this, I somehow reproduced it in Cinema 4D, and it turned out to be just fine, so here’s how it was made.
目次
Stylizing the Water Expression
If you read the tutorial I just gave you, you’ll see that I’ve stylized it into three elements to represent the water toon.
- The color of the water
- wave
- White waves on the beach
Making the Color of Water
In the Unity tutorial, the color of the water is not represented by a single color, but by a gradient that matches the depth of the water from the viewpoint. Well, if you ask me, this is true in reality.
In the tutorial, it seemed to be calculated by taking the inner product of “depth from camera to bottom” and “depth from camera to surface”.
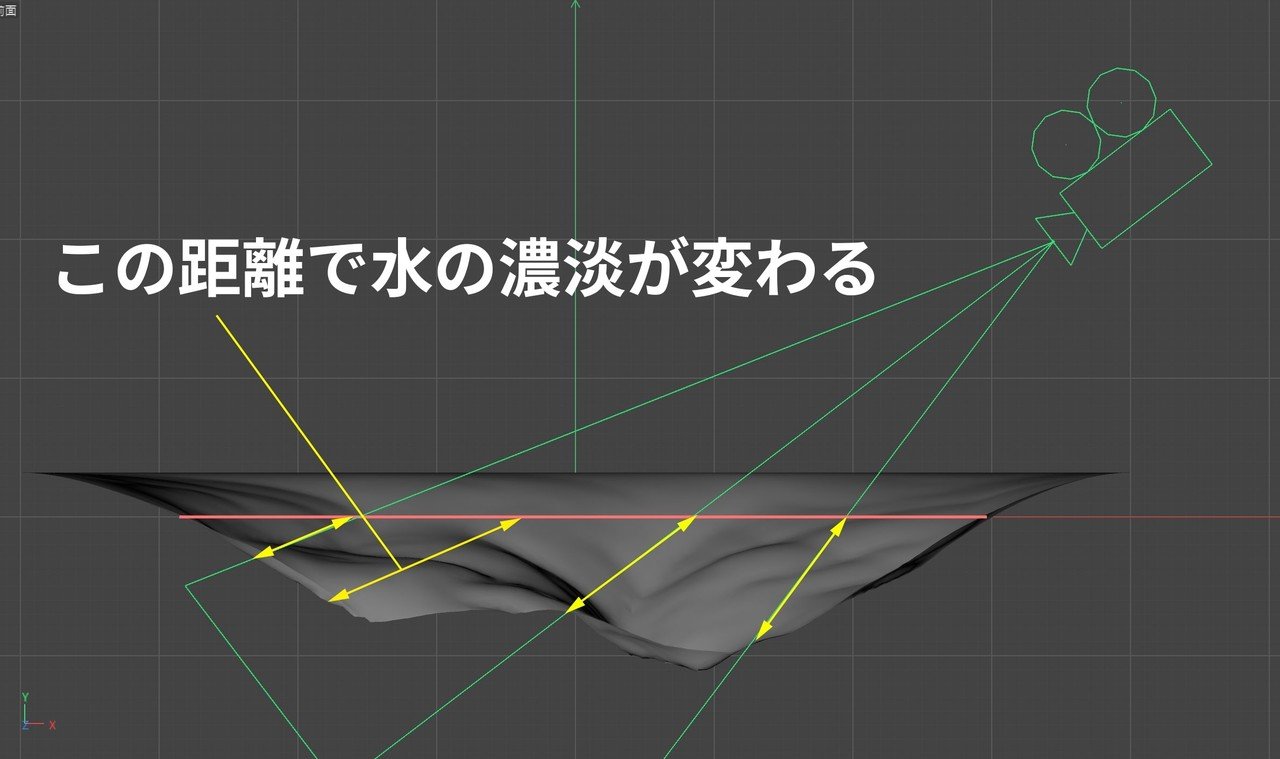
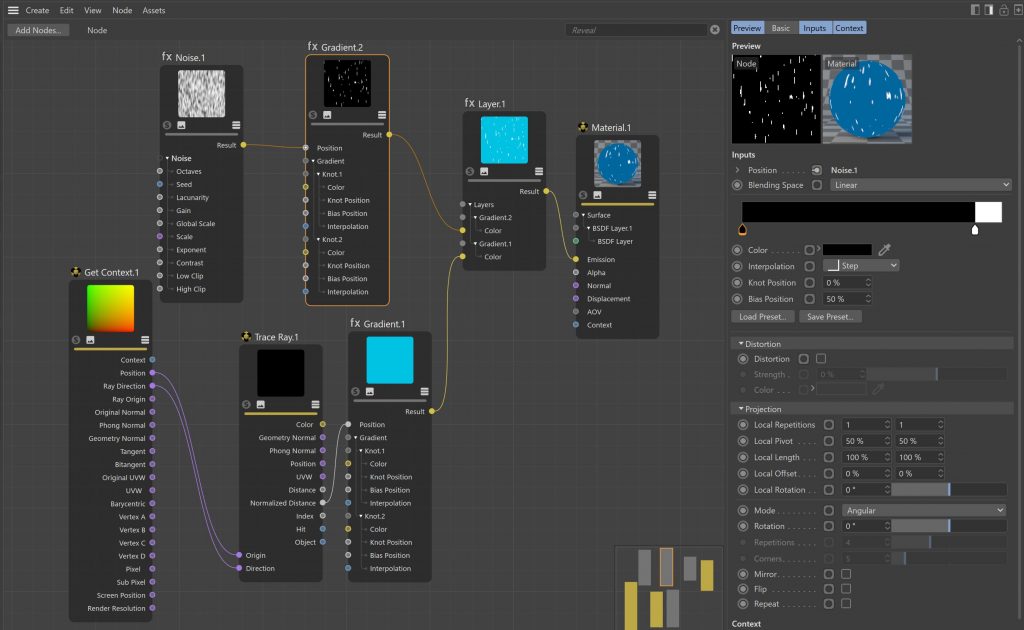
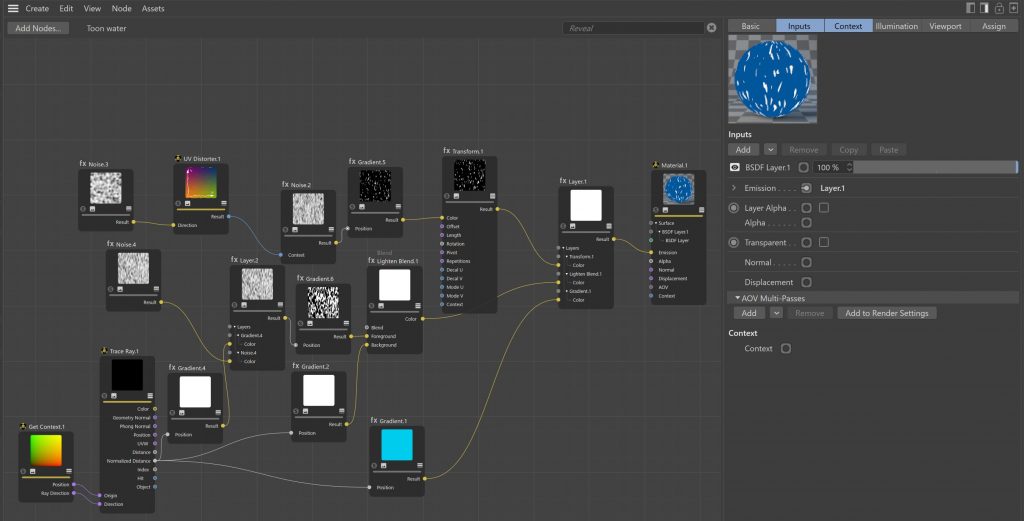
In Cinema 4D, you can measure this distance from the water surface with two nodes of the node material, “Trace Ray” and “Get Context”.
Connect origin of Trace Ray node and position of Get Contect node, also Ray direction and Direction.
Select the Trace Ray node and enter the Max distance to the depth of the water with a gradient of in the Attribute Manager. In this scene, Max Distance to the depth is about 300 cm, so we set it to 300.
<Connect the Normalized Distance in Tracing Rays to the Glow in the Material Node. <The Normalized Distance recreates the actual depth of the water as 0-1 to the Maximum Distance. That is, it outputs a value of 0 for a distance of 0 and 1 for a distance of 300.
Connect Normalized Distance of Trace Ray node to Emission of Material.1 node. Normalized Distance will reproduce the actual depth distance as 0-1 up to the Max Distance.
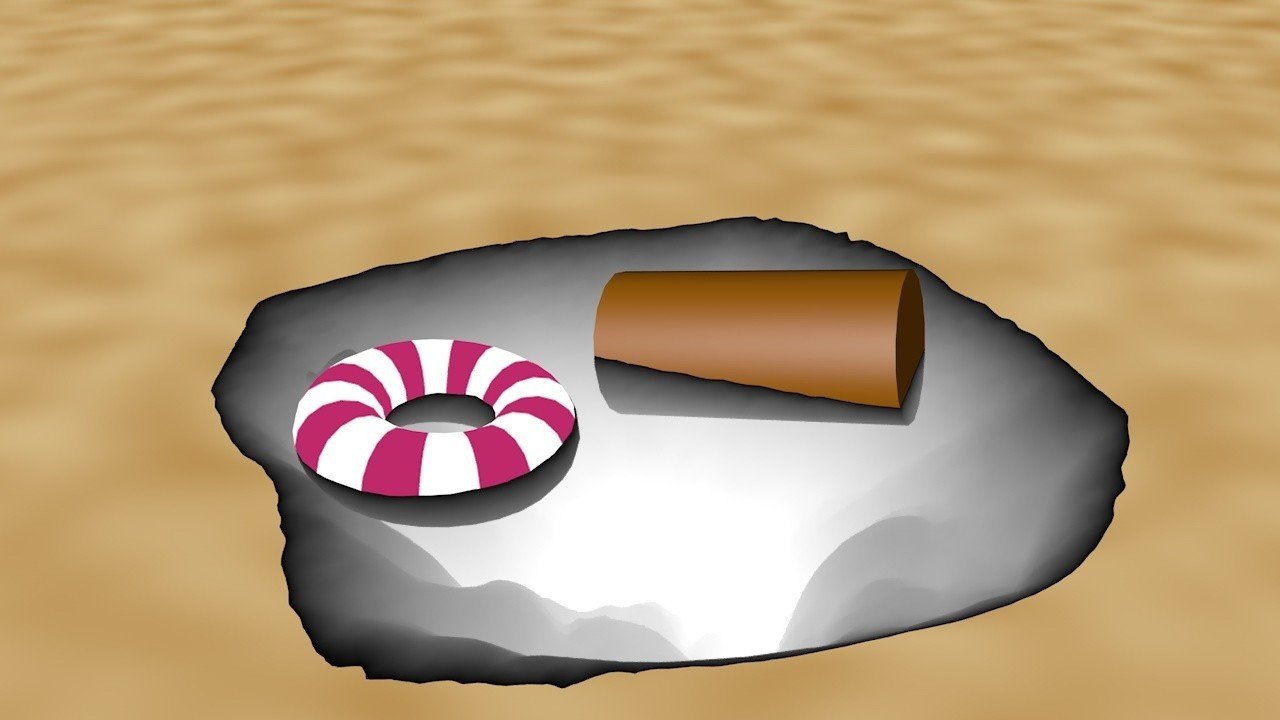
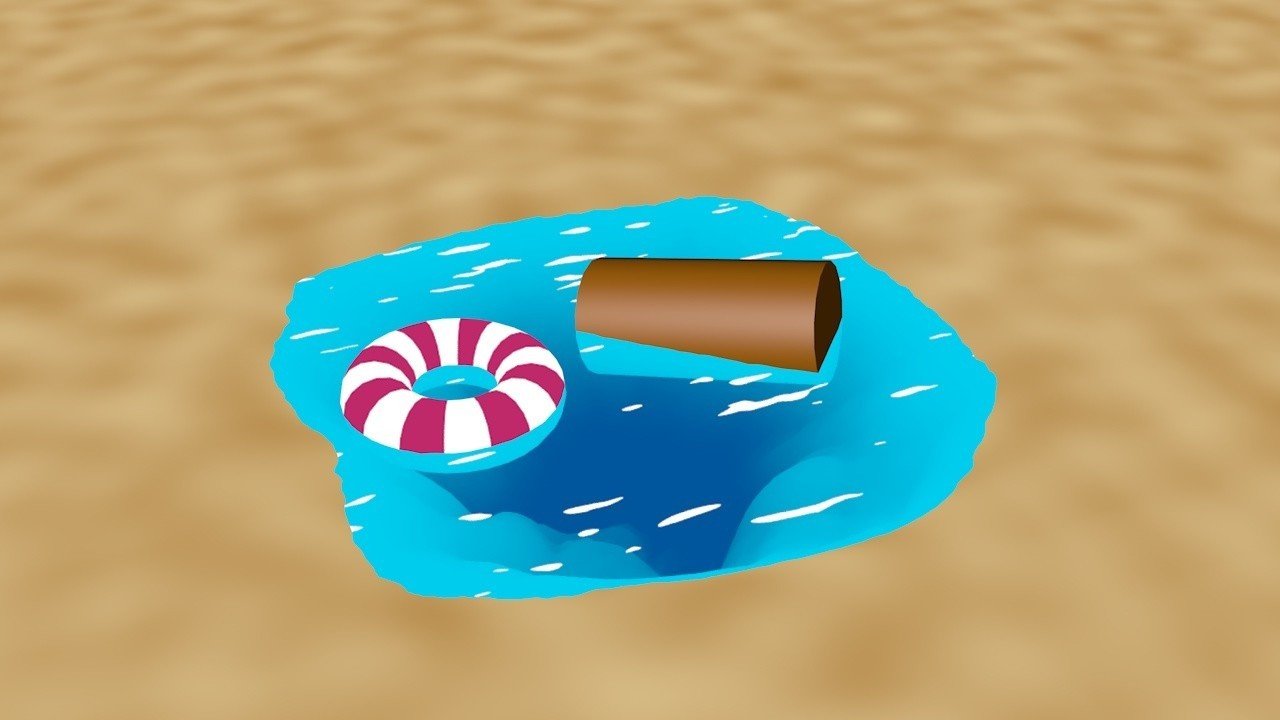
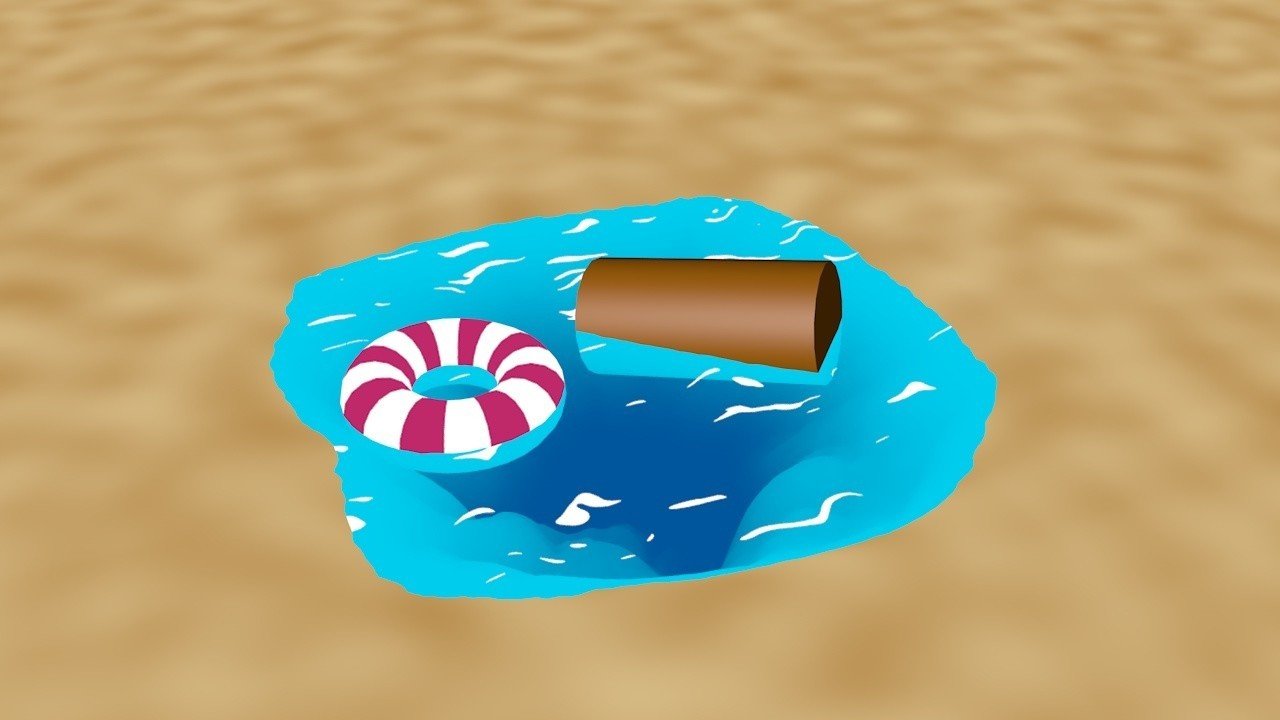
Assigning this material to the surface of the water and rendering it will result in the following rendering.
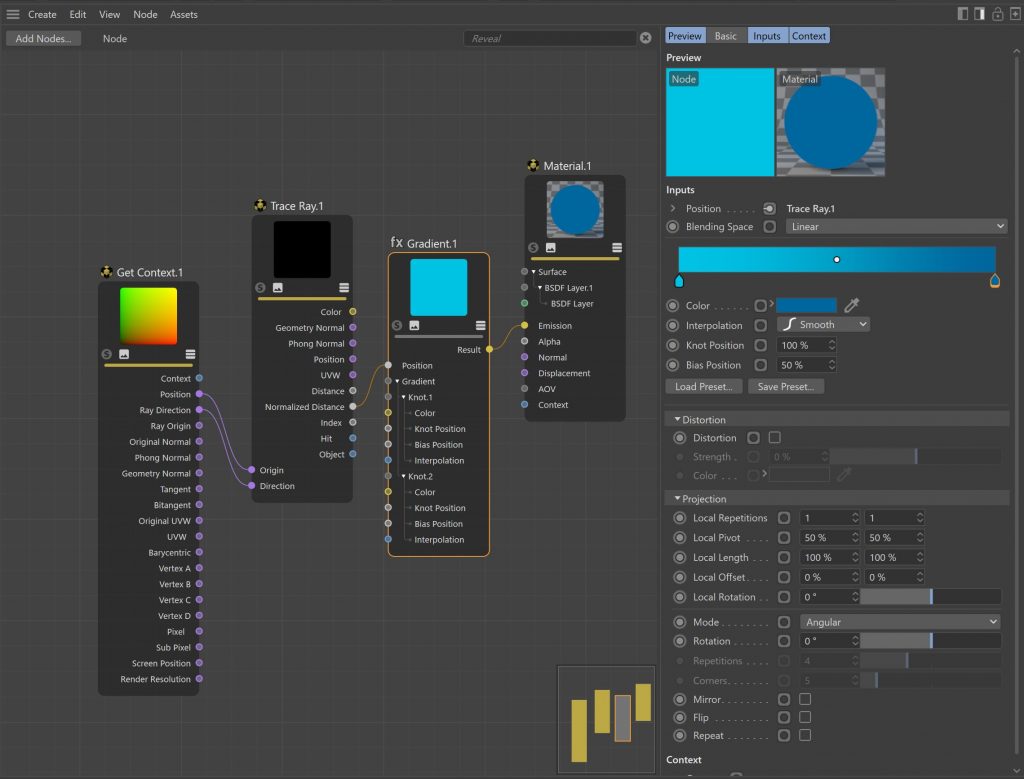
Now that we have a gradation of water depth, let’s turn it into the water color. To make it water colored, place the Gradient node between the Trace Ray and Material nodes.
Creating Waves
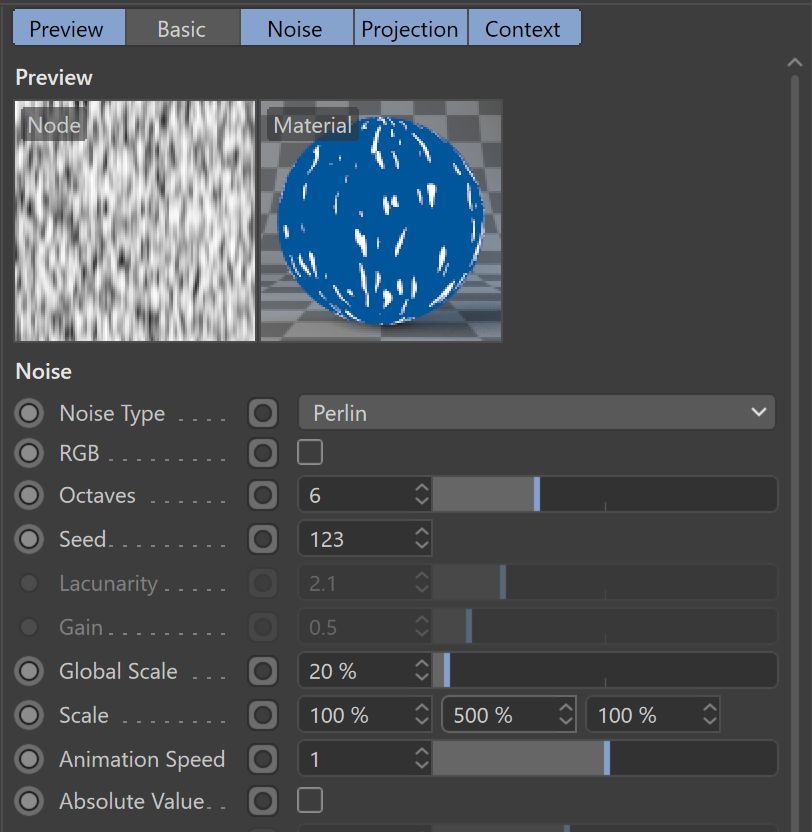
Waves are relatively simple. Connect the node to the position of the node and adjust the gradient. The interpolation of the gradient is done in steps, with a spastic change between white and black. The amount of parallelism changes depending on the border between white and black.
I also want the waves to be a little longer, not as if they were, so I set the Global Scale of the noise to 20% and the scale Y to 500%. This is adjusted for the size of the object and what you want to represent (river, ocean, lake, etc.).
Combining the water in the Layers node with lighten mode. White water is added.
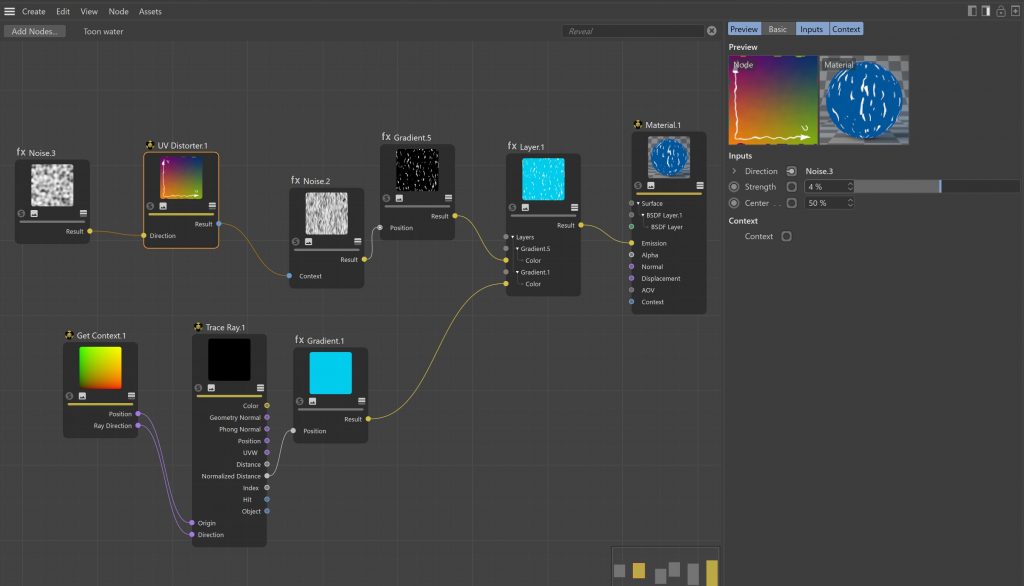
If you want to get a little more detailed and make the waves, connect a UV Distortion node in the context of the Noise node and set the Strength to 4-7% and replace it with another noise to make the waves bend instead of being straight and give them a random feeling.
White wave at the edge of a wave
Finally, make a white wave at the end of the wave. There are two ways to make it.
One is to use the first depth gradient to make the very shallow parts of the water white.
The other way is to assign a vertex color tag to the water object, use a field to put the ground or a float in the field, add a vertex color at the intersection and use it as a mask. However, this method has the following limitations
- The water surface must be made into a polygon (to create the vertex color tag).
- The polygons must be divided to some degree of detail.
- You need to put all objects that touch water in the field.
The advantage of this gradient is that it has the advantage of being able to clearly show white waves on the sides, but we will use a gradient of depth which requires less work to manage the object.
However, if we use a white gradient on the edge of the wave as shown in the image below, it is not natural and does not show turbulence.
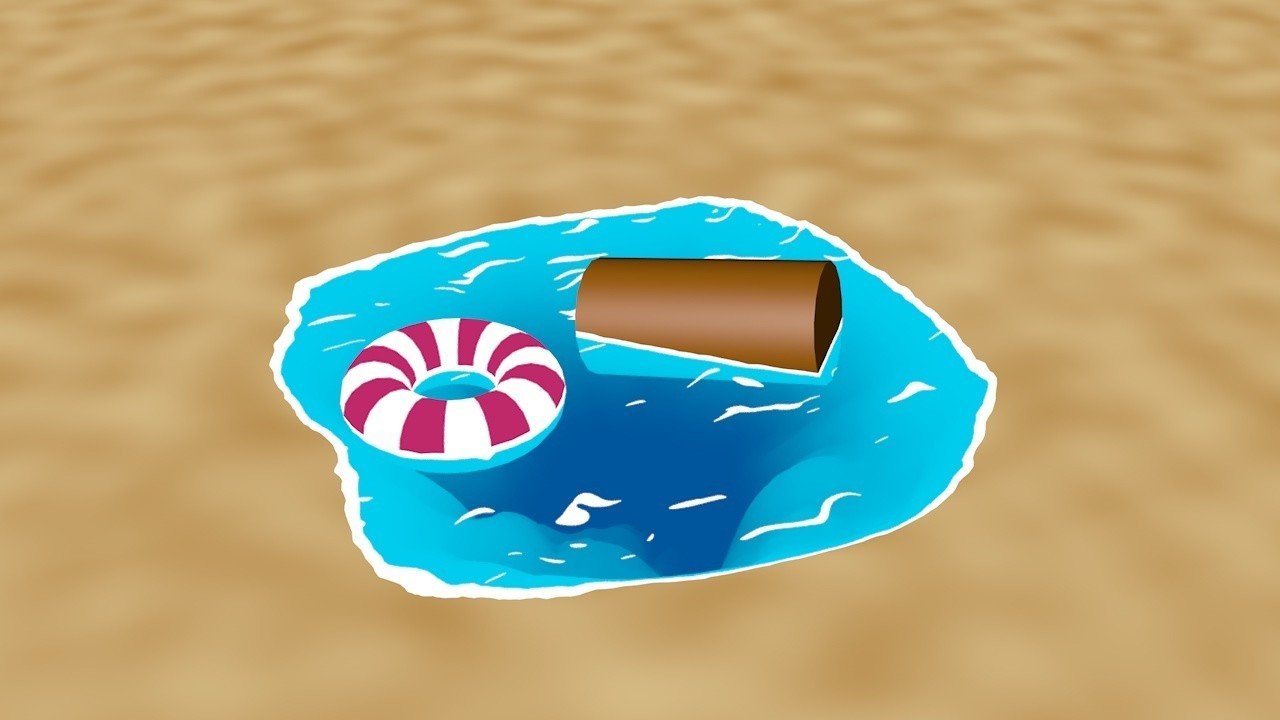
White the very shallow part of the water, and then subtract and combine the noise up to the point where the deeper part is white, to create the feeling of waves. Finally, layer it on top of each other to complete the image.
Here’s the finished image, I moved the UV and noise around to animate it.
You’ll need to adjust the size of the noise and the maximum distance of the ray to the trace node, but you can also make a river with the material.
I haven’t explained it in detail, but I’ve shown you how to connect the nodes, so you can probably reproduce it.